Get Your Software Project Moving: From Concept To Completion

Managing Software Projects

Have you ever opened an app or tried to use a piece of software and thought, “What the heck is this?” Maybe the user interface was confusing, or the code was buggy, or the software didn’t even work at all.

Chances are, the developer or team behind it didn’t do a good job managing the project. In fact they were probably just trying to get customers without focusing on the user experience.

To lead effective software projects, you need to get organized and stay ahead of the game. That’s why it’s crucial to understand why software management is important, what kinds of tasks must be completed, and why such projects can fail.

In this blog post, we’ll walk you through everything you need to know about how to manage a software project from start to finish. By the time you’re done reading, you’ll be more confident and better equipped to handle your next project. So let’s get started.

Why is software management important

Why is software management important?

If you haven’t noticed, software projects are everywhere—from the phone in your pocket to the dashboard of your car. It’s become undeniable that software is becoming increasingly intertwined with every aspect of life. You can even buy groceries through software.

Now, with that said, it’s easy to understand why software project management is so important. After all, if you’re running a software project that contains hundreds of thousands of lines of code, it’s essential to have a comprehensive plan in place to ensure everything goes smoothly.

Your most important objective as a software manager is to ensure the project is successful. To do this, you must ensure that all of the essential tasks are completed.

Here’s a brief list of what kind of things you may need to do when managing a software project:

  • Wireframes and mock-ups
  • Development and testing
  • Documentation and user guides
  • Bug tracking/issue solving
  • User acceptance tests
  • Deployment and maintenance.

Why software projects fail

Why software projects fail…

Maybe, you’ve experienced it yourself: the sinking feeling in your stomach when the software project you’re managing fails to accomplish its goals. After weeks (or months) of hard work, the last thing you want is for all that effort to go down the drain.

But here’s the good news: recognizing and addressing common pitfalls behind failed software projects can help you avoid repeating prior mistakes — like a virtual GPS system for navigating rough waters. So what are some of these missteps?

Well, first and foremost, there’s a tendency for people to skip important steps when developing a solution. They dive directly into coding without planning out the details or testing whether certain requirements are actually achievable. Think of it like building a house without taking time to put blueprints in place: work might continue but at some point, your structure will collapse without a solid foundation.

Similarly, launching prematurely — without verifying user needs or ensuring high-quality results — can lead to project failure. Aim to avoid this fate by investing time upfront to make sure everything is ready before pushing ‘Go’ on your venture.

Finally, bad communication between stakeholders and the development team can be a major source behind software project failure. Remember: everyone needs to stay on the same page, and that won’t happen if they’re not regularly talking to one another.

Types of Software Projects

9 Types of Software Projects You Should Know

What kind of software are you looking to develop? Are you working on a web application or mobile app development project? Knowing the type of software you’ll be developing is essential for successful software management. Here’s a brief list of nine common types:

  • Desktop applications
  • Web applications
  • Mobile applications
  • Embedded systems
  • Business software
  • Database systems
  • Gaming software
  • Machine learning projects
  • Cloud-based services.

5 common challenges when managing a software project:

Now that you know a few of the most popular types of software projects, let’s discuss some of the common obstacles faced when tackling them.

  1. Unclear Objectives: Without well-defined objectives, it can be difficult to measure success or to plan out an effective timeline. Make sure everyone is on the same page right from the start.
  2. Unmet Expectations: Software projects can easily require a lot of people and resources, which makes it hard to guarantee success. Aim to keep expectations realistic from the get-go in order to avoid disappointment down the line.
  3. Unexpected Costs: Cost overruns can often occur during software projects; be sure to plan for contingencies and allocate additional resources as necessary.
  4. Poor Onboarding of Talent: The onboarding process is key — you’ll need to ensure that everyone involved has a good grasp of the project and the tools they are working with. Especially, if they are coming into the middle of the process.
  5. Re-engineering: Re-engineering can be a major time sink, so it’s important to have a plan in place to fix any issues that arise quickly and efficiently.

Assembling Your Ideal Team

Assembling Your Ideal Team

Assembling the right team for software development is like assembling a world-class orchestra. All of the pieces must come together seamlessly to create beautiful music.

After all, the members of your team will be responsible for the success or failure of your software project. So, it’s extra important to surround yourself with experienced professionals who possess the right skills, motivation, and enthusiasm.

Finding Experienced Talent

But what specifically should you look for and how can you make sure they are a fit for your team?

First off a software team is often made up of a couple of specialized roles. These can include but aren’t limited to:

  • Developers: The “musicians” of the orchestra, responsible for writing code;
  • Project Managers: The “conductors” of the team, who will keep everyone organized and on-task;
  • Designers: The “artists” in the mix, in charge of ensuring the project looks and feels great;
  • Quality Assurance (QA) Engineers: The “critics” of the orchestra, keeping a close eye on any potential bugs.

In addition to these roles, it’s also important to keep an eye out for individuals who have experience in your particular software platform, as well as those with a strong sense of business acumen and problem-solving skills.

Where do you find the talent?

If you’re stuck wondering how to find the right people, don’t forget that there are plenty of online job boards and recruiting tools available to help match you with excellent candidates.

Upwork and Fiverr are our favorite go-tos for finding talent. They make it super easy to find professionals with the exact skills you need and allow you to narrow down your search using their detailed filters. Plus, they make paying and managing your team members simpler than ever. You can also consult staffing companies like DOIT Staffing or head hunters to find top talent.

Special Note: As you search these platforms, keep in mind that an effective post should focus on the key details such as job requirements, payment terms, deadlines, etc. Additionally, it’s also important to provide clear directions on how interested individuals can respond with their CVs or portfolio samples if available.

Something like this should do the trick:

“We are looking for an experienced software developer with knowledge of _____. The project will require ___ hours of work and will be compensated with a rate of ___ per hour. Please submit your CV and portfolio samples to___. Deadline for submission is ____.”

What if you’re paying per project?

If you are paying per project, rather than per hour, then it’s also important to provide a timeline and milestones for the team. This will help everyone stay on track and avoid any potential confusion or disagreements down the line.

Discerning if they’re a fit…

Once you have a list of potential candidates, it’s time to do your due diligence and make sure they’re the right fit for your team.

Don’t forget to evaluate them in terms of their overall compatibility with the team. After all, you want everyone to get along and work together efficiently; this means finding individuals who have compatible personalities and communication styles.

Most importantly, make sure to discuss the job in detail. This should include outlining your expectations, project timeline and deliverables. And even consider where the ambiguity is and how you might manage it.

In addition, make sure to assess each individual’s personality and attitude. After all, software development is often a team effort and the success of any project will depend on everyone being in sync with one another.

At this point, if all goes well, you have the perfect orchestra playing together in harmony — all ready to create beautiful music.

Software Development Project Life Cycle

Managing your project – The five phases of software development project life cycle

Once your team is in place, it’s time to focus on how best to manage the project. To do this, you’ll need to become familiar with the five phases of the software development project life cycle. This includes:

  1. Requirements gathering and planning
  2. Design and implementation
  3. Testing and quality assurance
  4. Deployment and maintenance
  5. Documentation

This is a well known framework for managing software projects. Each stage has its own distinct set of tasks and deliverables that need to be completed before you can move on to the next one. Let’s take a look at each one in more detail.

1. Requirements gathering and planning:

This stage is like writing the introduction to a novel: it sets the stage for all the exciting action to come. It might seem tedious or even unimportant, but this crucial step can help guide you and keep your work on track.

The goal of this stage is to define your project’s scope, timeline, and budget.

Scope = What the project should accomplish
Timeline = When it should be completed
Budget = How much it will cost

Scope

To arrive at your project’s scope you’ll need to consider a few factors:

  • What is the problem that needs to be solved?
  • Who will use the software?
  • What functionality does it need to have?
  • And what technologies must be used in its creation?

Timeline

When setting your project’s timeline, be sure to allow as much time as you need to complete the project. As they say, “Rome wasn’t built in a day!”

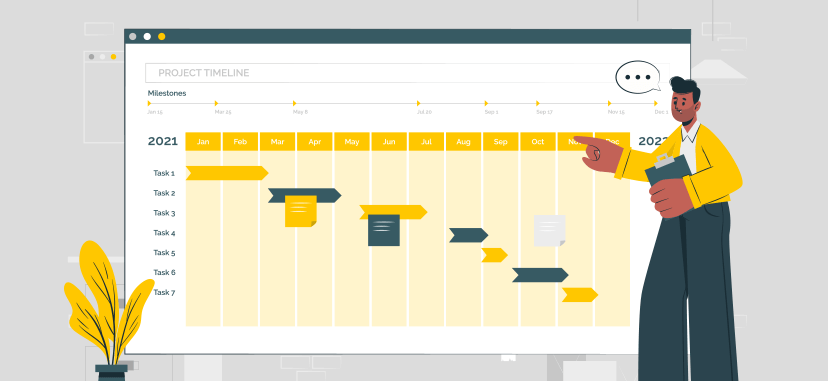
Also, be sure to break it down into smaller steps and establish individual deadlines. Then, set milestones off in the distance that act as signposts – not necessarily achievable checkpoints along the way, but places where you can take stock of your progress and course-correct if necessary.

Budget

Finally, the budget should match your timeline and scope. If you don’t have enough resources to complete the project on time and within budget, then it’s better to reevaluate or renegotiate rather than start off with a plan doomed for failure.

2. Design and implementation:

This phase includes creating system designs, wireframes and user interface mockups. It also includes determining the architecture of the system, as well as any programming or coding that needs to be done.

To create system designs, wireframes and mockups, you’ll need to have a deep understanding of the user experience. You’ll want to make sure that each element is designed with your users in mind and that they create a consistently pleasant experience.

Also, be sure to consider how this all fits within the architecture of the system, both in terms of data structure, programming language and any other technologies that need to be implemented.

If you were to analyze the most successful software projects, you would find that they all have one thing in common: careful consideration of the user experience and architecture. After all, your users will be the ones who determine whether or not a project is ultimately successful.

Testing and quality assurance

3. Testing and quality assurance:

This is an essential step in the process, and it’s important to take the time to do it right. This phase includes verifying that the software works as expected and is free of bugs and errors.

Testing the software thoroughly is essential to making sure it runs smoothly. This process also includes conducting user acceptance testing with select users to ensure that the system meets everyone’s needs and standards.

When TESTING keep in mind:

FIRST, make sure to test the functionality of your software. This includes everything from basic navigation and usability to more complex features. Testing all of the functionality of your software will help to ensure that it works as intended and that there are no hidden bugs.

SECOND, pay attention to how your software performs under different conditions. This means testing it on different operating systems, with different hardware, and under different loads. This will help you to identify any potential performance issues.

THIRD, make sure to test the software’s security. This is especially important if your project deals with confidential data or payments. Make sure that all of the security measures are up-to-date and working as expected.

FINALLY, don’t forget to perform regression testing. This is the process of running tests again after making changes or updates to the software. This will help to ensure that the changes did not introduce any new bugs or errors.

Taking the time to properly test your software is essential for ensuring its quality. By following these tips, you can make sure that your software is ready for launch.

4. Deployment and maintenance

Once your software is tested and ready to go, it’s time for deployment. This step involves making sure that all of the necessary files are in place and that the system is set up correctly. It also includes configuring any hardware or networks that will be needed to run the software.

In addition, you may need to do some last-minute updates or fixes prior to deployment, such as updating the user interface or adding new features.

Once your software is deployed, it’s important to maintain it over time. This includes keeping up with any security patches and bug fixes that may be needed. It also involves making sure that the system remains compatible with any new system updates that come out.

Keeping the lines of communication with customer service open is also important. Make sure that your users are able to get help whenever they need it, whether it’s answering questions or helping with any technical issues.

5. Documentation

Finally, documenting your project is essential for ensuring that everyone involved in the process understands how it works. Documentation can range from a simple list of features to more in-depth tutorials and user manuals.

Having up-to-date documentation makes it easier for future developers and users to get up to speed on the system quickly. It also makes it easier to troubleshoot any issues that may arise.

Conclusion

From assembling your ideal team to managing the development process, deploying your software, and maintaining it over time, there are a lot of steps involved in managing a successful software project.

By following the tips outlined in this article, you can ensure that your project is properly managed from start to finish. With the right team and planning in place, you can create an amazing product that users will love.

Thanks for reading. And be sure to come back and visit the Teamly blog for more helpful tips and tricks for all things project management related!

Resource Leveling: Staying Afloat in a Sea of Tasks

Resource Leveling

You’re in the middle of a project and things are going smoothly. The team is hitting their milestones and everyone is working together like a well-oiled machine. But then you get the dreaded call.

One of your team members is sick and won’t be able to work for the next two weeks. You can already feel the panic rising in your throat. What are you going to do?

This is where resource leveling comes in. Resource leveling is the process of managing resources – such as people, machines, and other resources – to ensure that all tasks are completed on time and with the right amount of resources. It’s like a life vest in a sea of tasks, keeping you afloat when times get tough.

Resource leveling helps you to prioritize tasks based on their importance, as well as to predict when and how much resources will be needed. This way, you can ensure that all tasks are completed in a timely manner without overburdening your team or running out of resources.

But what exactly is resource leveling, and how can you use it to your advantage? Let’s take a closer look.

What is Resource Leveling

What’s Resource Leveling?

Resource leveling is the practice of evenly distributing resources across multiple tasks in order to prevent too much or too little from being allocated to any one task.

The goal of resource leveling is to spread the workload evenly between team members, creating a healthy work environment and making the project schedule attainable. It’s also a great way to address any issues with availability of resources, such as if one team member is on vacation or has taken on an extra project.

Resource Leveling Examples

Let’s say you have two people working on a customer support project. One is assigned to work on the customer’s account setup, while the other is assigned to answer calls and assist with account inquiries.

The team member who is answering calls and assisting with account inquiries is getting overburdened by the demand for customer support. The other team member is not as busy and can pick up some of the slack if needed.

Using resource leveling, you could evenly distribute the workload by assigning each team member equal numbers of customer inquiries each day. This would help to make sure that both team members have enough work but aren’t overwhelmed with too much.

Most likely you’re already utilizing resource leveling in some way, but understanding the concept and actively planning your resources is key to ensuring that everyone on your team has enough work without being overburdened.

Resource Leveling Benefits

Four Ways that Resource Leveling Can Help

We’ve identified four ways that resource leveling can help your team stay afloat in a sea of tasks:

  • Smoothing out uneven workloads
  • Identifying bottlenecks early
  • Increasing visibility into project problems
  • Addressing scope changes

Smoothing out uneven workloads

Do you have team members who are always running around like chickens with their heads cut off, while others seem to have too much time on their hands? This can lead to frustration and resentment on both sides of the spectrum. Resource leveling evens out these uneven workloads by redistributing work among team members so that everyone has a more manageable workload.

Identifying bottlenecks early

Bottlenecks can seriously derail a project if they’re not identified and dealt with early on. By leveling resources, you can get an early indication of which parts of the project are going to require the most resources. This information can then be used to make adjustments to the project plan so that bottlenecks don’t become a problem later on down the line.

Increasing visibility into project problems

Another benefit of resource leveling is that it increases visibility into potential issues. By looking at how resources are being used (or not used), you can identify potential problems before they have a chance to cause major disruptions. This increased visibility can help you make better decisions about how to allocate resources and avoid potential pitfalls.

Addressing scope changes

If the scope of a project changes, it can often create havoc as far as resourcing is concerned. Resource leveling can help address these changes by determining how best to reallocate resources based on the new scope. This helps ensure that projects stay on track despite changes in scope and helps avoid last-minute scrambling to find additional resources.

Resource Leveling Tactics

7 Super Effective Resource Leveling Tactics

Now that you know how resource leveling can help, let’s take a look at some of the tactics you can use to effectively implement it.

Here are seven effective tactics for implementing resource leveling:

1. Borrow From Peter to Pay Paul

One way to level resources is by “borrowing” from another part of the project that doesn’t need those resources at that moment and using them where they’re more needed.

For example, if you have a team working on two tasks—Task A which requires four workers for two days, and Task B which requires two workers for four days—you might borrow two workers from Task A for the first two days of Task B, and then borrow two workers from Task B for the last two days of Task A. This ensures that both tasks get completed on time without any undue stress on your team.

2. Smash That Silo!

Silos are bad news bears for project managers. A silo mentality can lead to infighting among team members, hoarding of resources, and an overall feeling of mistrust among teammates. If you want your project to succeed, it’s important to encourage collaboration and break down silos early and often.

One way to do this is by creating cross-functional teams—that is, teams made up of members with different expertise who can complement each other’s skill sets. This kind of team environment fosters collaboration and prevents resource hoarding because members know that they need to share resources in order for the team to succeed.

3. The Cake Is a Lie! (Or Is It?)

In project management, it’s important not to promise more than you can deliver—but it’s also important not to deliberately lowball your estimates in order to make yourself look good. Nobody likes being lied to, least of all your project stakeholders.

A better approach is what one PMI member calls “deliberate optimism.” In other words, be realistic in your estimates but also err on the side of caution so that you don’t overcommit and end up disappointing people further down the line.

4. Keep It Lean (And Mean)

In lean manufacturing (and lean management more generally), one of the core principles is eliminating waste throughout the production process. The same principle applies to resource management: if there’s something getting in the way of efficient resource utilization, get rid of it.

This could mean anything from streamlining communication channels so that everyone is on the same page about what needs to be done when, or it could mean ditching outdated processes and tools that are no longer serving a purpose.

5. The Power of Prioritization

If you’re faced with a situation where resources are in short supply, one way to manage it is by prioritizing tasks according to their importance. This can be done manually or via software that can automate this process for you. We recommend Teamly not only for task management and tracking, but also for its powerful resource prioritization features.

By assigning values to tasks according to their importance, you can ensure that the most important tasks are being handled first and resources are not wasted on low-priority tasks.

6. Zoom Out For The Big Picture

It’s easy to get bogged down in minutiae when managing a project, so it’s important to take a step back every now and again and look at the big picture.

Ask yourself: What is the overall goal of the project? Which tasks need to be completed in order for that goal to be met? How can I best utilize my resources so that those tasks are completed efficiently?

7. Don’t Just React – Be Proactive

As a project manager, it’s important to stay ahead of the curve. If you see potential problems looming on the horizon, take steps to address them now rather than waiting for them to become a full-blown crisis.

This could mean having regular meetings with your team to discuss future plans, engaging with stakeholders to ensure everyone is on the same page, or training your team members in different skills so that they can take on more tasks in the future.

Resource Allocation, Resource Leveling, and Resource Smoothing

The Three Rs of Project Management: Resource Allocation, Resource Leveling, and Resource Smoothing

There are a lot of terms used in project management that can be confusing. In this case, three very similar-sounding terms are often used interchangeably: resource allocation, resource smoothing and resource leveling.

While these concepts all deal with the same idea—getting the right resources in place to achieve a project’s goals—each has its own distinct definition and purpose.

Resource Allocation

This is the process of assigning resources to specific tasks based on their availability and cost. The goal here is to make sure that you’re getting the most out of your resources in terms of quantity, quality, and price.

Resource Smoothing

The focus here is on balancing the amount of work across different areas or people in order to minimize interruptions to productivity. Here, the goal is to avoid peaks and troughs in demand so that your project runs as smoothly as possible.

Resource Leveling

As you know by now, this involves adjusting the timing of tasks and shifting resources around in order to make sure that everyone on your team has enough work but also isn’t overwhelmed by too much work. This helps to ensure that deadlines are met, goals are achieved, and resources aren’t wasted.

Types of Resource Leveling Tools

5 Types of Resource Leveling Tools Every Project Manager Needs

Luckily, there are plenty of different resource leveling tools out there that can help you keep your project on track. Here are five of the most popular types:

  1. Gantt Charts
  2. Critical Path Method
  3. Resource Allocation Matrix
  4. Project Management (PM) Software
  5. PM Templates

1. Gantt Charts

Gantt charts are one of the most popular tools for resource leveling (and for good reason). They provide a clear and easy-to-understand overview of your project, and they make it easy to see which tasks need to be completed when.

Plus, Gantt charts can be used for more than just resource leveling—they can also be used for project planning, task management, and tracking project milestones. In other words, they’re the perfect all-in-one tool for busy project managers.

2. Critical Path Method

The Critical Path Method (CPM) is another popular tool for resource leveling (as well as project management in general).

CPM is all about finding the shortest path from start to finish—which is essential for keeping your project on schedule and ensuring that it’s completed on time and within budget.

3. Resource Allocation Matrix

A Resource Allocation Matrix (RAM) is a tool that helps you assign tasks to team members based on their skills and availability. This is related to resource leveling because it ensures that each team member is working on tasks that they’re qualified to do—which frees up your time so that you can focus on other aspects of the project. RAMs can be created using spreadsheet software like Microsoft Excel or Google Sheets.

4. Project management software

If you’re looking to take your resource leveling to the next level, you might want to consider using project management software. These tools provide powerful tracking capabilities that make it easy to keep an eye on everyone and everything associated with your project.

They also come with a wide range of features, such as task allocation tools, automated notifications, and reporting functionalities—all of which can help you stay on top of your resource levels and ensure that everyone is working efficiently.

We suggest trying out Teamly. It’s free to get started and it has a lot of built-in tools that help keep your team connected and organized. Teamly has realtime chat features, which is great for when you need to keep everyone in the loop about any changes or updates.

It also allows you to assign tasks and track progress, view overall project progress and screen capture capabilities whether you need to make a quick video or capture a picture, you can do it all on Teamly. You can also save time with Teamly’s templates (see next point)

5. Project Management (PM) Templates

Finally, one of the best ways to make sure that your resource leveling is going smoothly is by using project management templates. Templates are pre-made project management documents that you can customize for your needs.

Teamly’s templates make it easy to create project plans, budget sheets, resource allocation schedules, and more—all without having to start from scratch.

They have over 100+ pre-written Standard Operating Procedures (SOPs) and checklists for virtually any business, so your team can easily establish best practices.Use the templates “as is” or edit them to better suit your needs.

Conclusion

Resource Leveling may not be the magic pill that fixes all of your resourcing issues, but it can help you manage your resources more effectively and avoid some of the pitfalls that can occur when you’re over-allocating your resources.

Revisit the tools and tactics outlined in this article to ensure that you have the resources necessary to complete your project on time, on budget, and with the highest quality possible. Best of luck!

Becoming a Decision Maker: What Managers Need to Know

Managers as Decision Makers

Attention managers, you have more power in your hands than you think. You can be an amazing decision-maker, both quickly and confidently.

If you want to be a successful manager, you need to make the right decisions – and make them fast. After all, what separates successful managers from the rest? It’s their decision-making abilities.

Making the right decisions isn’t just about gathering the facts and crunching numbers. It involves passion and courage too. You have to develop a strong sense of judgment and the ability to think on your feet.

So how can you become a fantastic decision-maker?

In this blog post, we’ll explore what it takes to be a fantastic decision maker. We’ll give you some tips and tricks and show you how to avoid common pitfalls. So, put on your thinking cap and let’s get started.

The role of a manager

The role of a manager

As a manager, you’re frequently called upon to make decisions. Some of these decisions are small and insignificant while others have the potential to change the course of a project—or even an entire company.

The bottom line is that you need to be confident in your decision-making abilities. And the only way to do that is to understand what it takes to make effective decisions.

4 Basic Types of Decisions

The reality is we all make decisions every day. Some are small, like what to wear or what to eat. Others are bigger, like whether to move to a new city or change jobs. But whether big or small, all decisions involve trade-offs.

There are four basic types of decisions: those that are simple, complex, risky, and ambiguous. Each type of decision requires a different approach. Here’s a quick overview of each:

  1. Simple decisions are made all the time, like deciding what to have for lunch. They don’t require much thought or analysis because the options and outcomes are clear. In work-related decisions, simple decisions are generally those that don’t have long-term implications.
  2. Complex decisions are more difficult because there are multiple variables and outcomes to consider. In work settings, complex decisions often involve multiple departments or teams and must be made with full awareness of the potential impacts.
  3. Risky decisions are ones where there is uncertainty around the outcome. These types of decisions require careful analysis of the risks and opportunities before making a choice.
  4. Ambiguous decisions involve a great deal of uncertainty and are often based on incomplete information. They require the ability to think creatively and come up with creative solutions.

Invisible Forces

Invisible Forces

Have you ever noticed how some decisions seem to be made effortlessly while others can feel like a struggle? Part of the reason for this is that there are invisible forces working on every decision.

These invisible forces can come in the form of biases, past experiences, emotions, and mental models. It’s important to recognize these forces so that you can weaken their effect and make better decisions.

Biases

Biases can have a huge impact on our decisions. We all have them, and it’s important to be aware of how they influence us. There are several well known cognitive biases, such as the confirmation bias and the status quo bias.

To avoid biased decision-making, be sure to seek out diverse sources of information. This will help you to see the situation from multiple perspectives and make a more informed decision.

Past Experiences

Our past experiences can also be a powerful influence on our decisions. We often draw on past experiences to inform our present decisions.

However, it’s important to remember that each situation is unique and requires its own approach. Don’t let old experiences dictate your decisions. Instead, take the time to evaluate each situation on its own merits. And be sure to remember that what worked in the past may not work in the future.

Emotions

It’s easy to let our emotions get in the way when we’re making decisions. After all, it’s only natural to feel nervous or excited when a big decision is on the line.

But it’s important not to let your emotions run away with you. Whether that’s fear, excitement, or something else entirely. Instead, take a step back and evaluate your options objectively. This will help you make better decisions.

Mental Model

Finding a Mental Model that works for you

One huge part of being a successful decision-maker is finding a mental model that works for you. A mental model is a framework that helps you look at problems from different angles and make more informed decisions.

There are many different mental models out there, so it’s important to find one that resonates with your values and approach.

Here are a few mental models to help get you started:

  • First-Principles Thinking
  • Second-Order Thinking
  • Inversion
  • The problem hypothesis
  • The five why’s

First-Principles Thinking

Tesla CEO and Tech entrepreneur Elon Musk has long been an advocate of first-principles thinking. This model encourages you to go beyond surface level observations and look at the underlying logic of a situation.

The idea is to start with basic facts and then build up from there. This helps break down any assumptions or preconceived notions and can give you a clearer picture of the situation at hand. Typically, this model is best used when there’s a lot of uncertainty or conflicting information.

For Tesla, this has been invaluable in helping them innovate and stay ahead of the competition. Essentially, they’ve revolutionized battery technology by removing the analogies that have been used before and starting with fundamental physics.

It works the same in management. By breaking down a problem and looking at the underlying principles, you can gain clarity and make better decisions.

Second-Order Thinking

This mental model is all about considering the consequences of your actions. It encourages you to think beyond the immediate outcome and consider the downstream effects of your decision.

For example, if you’re deciding whether or not to launch a new product, you need to consider the long-term implications. Will launching this product help you gain more customers? Or will it cause production and delivery costs to skyrocket?

It’s important to think beyond the first order effect and consider how your decision will ripple out into other areas of your business.

Inversion

This mental model is a bit more abstract, but it can be incredibly powerful. Essentially, it encourages you to think about the opposite of what you’re trying to achieve.

For example, instead of focusing on how to increase profits, invert the question and ask yourself how you could reduce profits. This helps you identify potential risks and hidden costs that you might not have considered before.

The problem hypothesis

This mental model encourages you to develop a hypothesis about the problem before jumping in. You need to ask yourself questions like: What do I know about this problem? How can I best approach it?

Let’s say you need to onboard a lot of new employees. What you know is that the process is going to be time-consuming and expensive. So you need to come up with a plan of attack that will help reduce onboarding costs while still ensuring quality of hires.

The Five Whys

This mental model encourages you to dig deeper into your problem by asking “why” five times. This helps you find the root cause of your problem and brainstorm solutions that can address this underlying issue.

Let’s say you’re trying to reduce employee turnover. You could ask yourself why employees are leaving, which then leads to more questions like why are they unhappy? What could be done to make them happier?

By asking “why” five times you can get to the heart of the issue and start developing a plan of action that will effectively reduce turnover.

Now that you’ve got some mental models for decision making in your toolkit, it’s time to put them into practice.

Implement Decision Making

6 Steps to Implement “Decision Making” With Your Team.

You know what they say: you can lead a horse to water, but you can’t make it drink. The same is true of decision-making in organizations. As a manager, you can make decisions all day long, but if you don’t have a system for implementation, those decisions will never see the light of day.

Think of implementation as the gasoline that powers the engine of your organization. Without it, you’ll just be spinning your wheels. But with a strong implementation plan, you can turn your goals and objectives into reality here’s how:

1. Get buy-in from your team.

If your team doesn’t believe in the decision you’ve made, they’re not going to be motivated to help you implement it. Create an affinity for the decision by involving your team in the process.

What’s the process? Well, you can use any of the mental models discussed above to help your team understand the decision-making process and get them on board with it.

Developing a culture of buy-in is critical to successful implementation.

2. Define what success looks like.

Ambiguity is the enemy of implementation. When you’re unclear about what success looks like, it’s easy to get sidetracked or lost along the way.

To avoid this, be sure to clearly define what success looks like for the decision you’ve made. What metrics should you measure? Who is responsible for each task? What timeline are you expecting?

The key is to set expectations for each decision and clearly define what success looks like.

3. Create a plan of action.

Once you know what you’re trying to achieve, you need to create a plan of action. What steps do you need to take to get there? Who needs to be involved? What resources do you need? Map it out so that you have a clear path to follow.

Having a plan of action not only helps you stay on track, but it also helps keep your team motivated. After all, when they know what comes next and have an understanding of the end goal, it’s easier for them to stay focused and get the job done.

4. Delegate and empower others.

You can’t do everything yourself, so delegate and empower others to help you out. Choose people who are passionate about the project and give them the authority to make decisions themselves. This will help you move faster and avoid getting bogged down in details.

A manager’s job is to make decisions, but it’s also important to empower others and give them the opportunity to contribute.

5. Establish checkpoints to keep the team on track.

Decision-making isn’t a one-and-done process — it requires ongoing oversight and accountability to ensure successful implementation. Set up regular check-ins with your team to review progress, celebrate successes, identify areas of improvement, and adjust course when needed.

By implementing these checkpoints, you’ll be able to quickly identify any potential problems and course-correct before they become roadblocks.

6. Be prepared for challenges.

No matter how well you plan, there will be times when things don’t go as expected. Be flexible and creative in your approach to problem-solving and stay focused on the end goal.

Don’t let challenges derail you — instead, use them as an opportunity to learn and grow so that you can make even better decisions in the future.

At the end of the day, effective decision-making isn’t about having all the answers — it’s about being able to make decisions with confidence and implement them successfully.

Evaluating results

Evaluating results

You know the saying, “Hindsight is 20/20”? Well, in business, we like to call that “evaluating the results of your decision making.”

After all, you can’t improve what you don’t measure, and you can’t make sound decisions without knowing how your previous decisions turned out. In other words: you need to evaluate the results of your decision making in order to be a better decision maker.

But how do you evaluate the results of your decision making? To start, you need to take a step back and look at the big picture. What were your goals when you made the decision? Did you achieve them? If not, why not? Were there unforeseen circumstances that got in the way?

You also need to consider the impact of your decision on those around you. Did it help or hinder your team’s performance? How did it affect your relationship with your manager? These are important factors to consider when evaluating the results of your decision making.

Finally, you need to be honest with yourself. This can be tough, but it’s essential if you want to improve your decision making skills. Were you happy with the outcome of the decision? If not, why not? What could you have done differently?

Don’t be afraid to ask these questions and be honest with yourself. Evaluating the results of your decision making is the only way to ensure you’re making better decisions in the future.

Summary

The ability to make decisions quickly and efficiently is a hallmark of successful leadership. Of course, not all decisions are created equal.

As a manager, you’ll encounter different types of decisions that require different levels of analysis. By understanding the different types of decision-making models, you can streamline your process and make better choices for your team.

Implementing those decisions effectively is another challenge altogether, but one that can be overcome with careful planning and execution. Finally, it’s important to evaluate the results of your decisions and learn from any missteps. With these tips in mind, you’re on your way to becoming a masterful decision-maker. Thanks for reading!

Resource Scheduling Methods, Guidelines & Strategies that Every Project Manager Needs to Know!

Resource Scheduling Methods in Project Management

Have you ever had a client whose head is in the clouds? Maybe she wants a new porch, a hot tub and a brand new kitchen, all in under a few weeks.

Or has a client ever come to you in the middle of a complex project, asking you to speed things up and complete everything ahead of schedule?

Sometimes project management is about giving clients a reality check. Resource scheduling, particularly, gets down to the nitty gritty and carefully examines labor, materials and equipment to determine when something can really be completed, and at what cost.

At other times, you don’t have to pop their balloon and bring them back to planet earth. A few resource allocation tricks allow you to tweak and finesse a schedule, and deliver the seemingly impossible.

Interested in learning more? This post gets down to the basics of resource scheduling methods, including scheduling guidelines, hacks for busy project managers and more!

The Process of Developing a Resource Schedule

The Process of Developing a Resource Schedule

One central objective of a project’s planning stage is to create a schedule that really works, given all of the project’s constraints. “Really works” is key, but it’s also a challenge. In order to develop a viable schedule within the project’s scope, timeline and budget, planning is completed in stages, with resource scheduling coming near the end.

Let’s go over the steps for generating a reliable schedule, with a particular focus on where resource planning comes into the process.

1. The Assignment

During the initiation stage, a project manager receives the assignment, and is provided with a basic outline of its objective, timeline and budget.
This stage is about looking at the project in a broad sense. A feasibility study determines the project’s ROI and whether or not it makes sense to move forward. This study outlines the key resources required to achieve the objective.

2. Work Breakdown Structure

Once the project is green lit, the project manager puts his nose to the grindstone, scoping things out and laying a solid foundation. Primarily, he communicates with all stakeholders and gathers requirements.

Using the overall objective and high level requirements, it’s possible to create a work breakdown structure (WBS), which separates the project down into increasingly smaller work packages. The WBS, in essence, outlines all of the work required in a project, and is a template for determining the resources needed.

Work Breakdown Structure

3. Resource Breakdown Structure

The WBS segways right into creating a resource breakdown structure (RBS).

A resource breakdown structure examines all of the resources required to complete a project’s objective. Just like a work breakdown structure, it’s a hierarchical grid that starts with the project’s central objective. Rather than breaking things into work packages, however, the lower tiers examine the labor, equipment, materials and facilities required to complete each requirement.

Resource Breakdown Structure

The RBS is an excellent tool for outlining a project’s total resources. It’s used alongside the WBS to create a schedule.

4. Critical Path

With all the work codified, the next step is arranging activities in a sequential order, and identifying interdependent activities. The critical path method looks at all the tasks in the lower tiers of the WBS, and plots them sequentially in a network diagram. This diagram arranges activities in relation to one another, carefully considering which must be performed ahead of others, and which activities can be completed at the same time.

Critical Path

A network diagram also identifies dependencies between tasks. A dependency is a relationship between two activities that determines when one activity can begin. For example, in the project of building a house, the drywall must be installed before the electricity is wired. As one of these tasks must be completed before the other, these two tasks are dependent.

This initial critical path is only preliminary, as it doesn’t consider resource constraints. These are considered in the following step.

5. Resource Allocation

Now it’s time to allocate resources. Completing the previous stages allows this stage to be completed with precision.

The preliminary network diagram, to some extent, is created in a fantasy land where multiple people can do multiple things at same time, people are multi-skilled and equipment, materials and supplies are in unlimited supply. A resource analysis adds some reality to the network diagram.

Resources are an umbrella for many aspects of a project. They include all laborers (salaried and hourly), the equipment used to create the deliverable, and the materials used within the final project. Resources even refer to facilities, such as office space and porta potties for construction projects.

Resources generally have a capacity, limit, or constraint. Take people for example. One person cannot do two tasks at the same time, nor can he perform tasks outside of his skill set. Labor may be limited by market conditions, as well. Or perhaps someone’s hourly rate won’t fit with the project’s budget.

Equipment and materials have their own respective constraints. One piece of equipment, generally, cannot work on two activities at the same time. And some materials are only available in certain amounts, or in certain seasons.

This scarcity plays a central role in resource scheduling. Resource allocation primarily is about identifying a resource’s constraints, and creating a schedule that works within them.

At this stage, the project manager utilizes several guidelines and strategies (discussed later in greater detail) to develop an efficient schedule that stays within the project’s budget, scope and timeline, and that also considers dependencies between activities and constraints on resources.

Resource scheduling can increase the critical path, and sometimes it increases the budget as well.

6. Schedule Creation

And finally, with allocation of resources, it’s possible to create a schedule. This schedule usually looks different from the initial critical path. Allocating resources usually means that certain activities have been rearranged, and other activities have been broken down, depending on resource availability. This is also the stage for creating a budget, as the amount and cost of required resources is clear.

Creating a dependable and sensible schedule is a logical and orderly process. Allocating resources and creating a final schedule comes toward the end of project planning, as it uses information gathered in the preliminary stages.

Resource Scheduling and Allocation

Guidelines for Resource Scheduling and Allocation

Consider these guidelines for best results when allocating resources.

Multi-Tasking Is a Myth

Generally speaking, we cannot do two things at the same time, unless one of the activities is passive, like listening to music or waiting for paint to dry.

Performing two tasks that both require cognitive skills at the same time in fact makes people less efficient, and work performance declines.

When scheduling resources, rule out assigning two tasks to the same person at the same time. Even though it might look efficient on paper, ultimately this leads to a decline in work performance and the project suffers.

Less Float Before More Float

When two activities with float need to be scheduled in sequence due to resource scarcity, schedule the activity with the least amount of float first. (Float is a measurement of an activity’s flexibility; for example an activity may have two days of float, or two weeks of float.)

For example, if Activity A has two weeks of float, and Activity B has only one, schedule Activity B before Activity A.

This principle prioritizes the more urgent tasks over the less urgent, and decreases the likelihood of a delay in the project’s overall completion.

More Resources Before Fewer Resources

In a similar vein, when two activities requiring unequal resources need to be scheduled in sequence, schedule the activity that uses more resources first.
For example, if the project is to design a website, and Activity A involves a software designer and a copywriter, and Activity B only involves the copywriter, schedule Activity A first.

This way, the more complicated tasks are completed right away. Complicated tasks, generally speaking, come with greater risks, so it’s best to complete them sooner and leave the simpler ones for later.

As we’ll get into next, resource scheduling is strategic, and following these best practices guidelines increases the likelihood that a project runs smoothly.

Resource Scheduling Methods

Resource Scheduling Methods & Strategies

If you’re pulling your hair out wondering how to meet a deadline, sometimes pulling a few tricks out of your hat makes everything come together like magic.

This section explains resource allocation and schedule compression techniques, both of which finesse and create efficiencies in a schedule. These techniques work best when they’re applied in the order listed below.

Resource Leveling

Resource leveling is an allocation technique that’s used when the demand for a resource exceeds the supply. This oftentimes occurs when two activities on the network diagram are scheduled in parallel, and both require the same resource. For example, say Activity A and Activity B are scheduled on a Wednesday, and they both require the same equipment. This scenario is impossible. Leveling out the schedule requires adjusting the network diagram so that activities A and B are in sequence, rather than parallel.

Resource leveling means having a reality check. It examines the schedule to see if it actually works, given the constraints of people, equipment and materials. This is an initial step when adjusting a resource schedule, and it often results in extending the project’s deadline.

Resource Smoothing

Resource smoothing is another allocation technique that is used after resource leveling. It re-allocates resources to create a more even distribution throughout a project.

For example, if the critical path schedules someone to work two twelve hour days, smoothing re-distributes the work over three or four days instead.

Smoothing only looks at activities with float and adjusts their start and finish times. (Float is an activity’s wiggle room, essentially.) Resource smoothing does not extend a schedule, that is to say. Rather, it works within the given schedule to create a reasonable workflow.

Smoothing doesn’t work in every scenario, but when it does, it’s a useful way to ensure work is performed moderately and consistently.

These two resource allocation techniques help to remove logjams and smooth wrinkles in a schedule. Once this is complete, the next step is to find ways to make the schedule more efficient. The following compression techniques play a central role.

Crashing

If a client asks you to speed up a project, and move the deadline ahead by a few weeks, this sometimes necessitates crashing the schedule.

Crashing is a schedule compression technique that adds more resources to shorten the time it takes to complete an activity. Oftentimes, this means increasing the cost in order to get something done faster.

For example, maybe a construction team is building a deck onto a house. It’s using two carpenters and is slated to last three weeks. By adding two additional carpenters, the project in theory can be completed in only a week and half!

Crashing doesn’t always work. The duration of some projects cannot be compressed by the addition of more resources. Take the deck example. Suppose that one part of the project entails staining the wood, and this takes four days to dry. This process cannot be sped up with the additional carpenters. Crashing doesn’t work at other times because the additional resources don’t work within the project’s budget.

When it does work, crashing is an ideal compression technique as it generally doesn’t add a whole lot of new risk to a project.

Fast tracking

Fast tracking, as the name suggests, is another technique for speeding up a project. It entails taking two sequential activities on a critical path and arranging them parallel to one another.

Consider a house remodel. Maybe the initial plan was to build a deck, then a fire pit and then an outdoor oven. Fast tracking builds all these at the same time.

Fast tracking may look like multitasking, but of course it doesn’t work in every scenario. First and foremost, it only works when the resources allow for it. Assigning the same person to build two things at the same time clearly won’t work. It also doesn’t work when two tasks have hard dependencies. This means that one task must be completed before another.

Fast tracking introduces risk to a project. Oftentimes two activities, without having hard dependencies, are best completed in sequence rather than in parallel. Changing the sequence may lead to re-work.

Fast tracking has more downsides than crashing, and so it should be used in moderation. However, when it’s the only possibility, it’s an effective way to shorten a project’s schedule.

All of these techniques play a key role in resource scheduling. Note that none of them changes the project’s scope. The same amount of work is completed in every instance.

Resource Scheduling

Conclusion

Once you have a project, you know the tasks, and you have a WBS, the next step is to determine how it’s actually going to get done. Resource scheduling is about getting down to nitty gritty and creating a schedule that works within all the constraints of the project’s resources.

Sometimes it’s a bit of a reality check, similar to planning an extravagant vacation, and then looking inside your wallet. When you look at the hard facts, plans have a tendency to change.

Resource scheduling takes an orderly and logical approach to a project. Oftentimes, when the resources are all laid out, the critical path is adjusted and tweaked.

A remote team presents a special set of challenges to project planning. If you’re scheduling resources for a remote team, consider using Teamly, the project management software that makes scheduling and sharing workflows a cinch. Visit us and sign up today!

Ready to Take Control of Your Projects? Learn How Process Automation Can Help!

Process Automation in Project Management

Have you ever felt overwhelmed by the sheer amount of tasks and projects that need to be done? The deadlines looming, the hours I’ve worked and it still doesn’t seem like there is enough time in the day?

If this sounds familiar, then it’s time for you to take a step back, take a deep breath and get on board with process automation.

What is Process Automation

What is Process Automation?

In a nutshell, process automation is using technology to automate tasks that would otherwise be done manually. It’s perfect for project managers, small business owners, and anyone who feels like they’re constantly playing catch-up.

You can think of process automation like your trusty sidekick. It’ll be there to help you out whenever you need it, taking care of the tedious tasks that would otherwise take up your precious time.

This could be something as simple as setting up an email response to thank someone for subscribing to your newsletter or something more complex like setting up a CRM system to track your sales pipeline.

Here’s an example, let’s say you run an online store. Every time someone places an order, you have to send them a confirmation email. Most website builders have a feature that allows you to automatically send out thank you emails when someone places an order, which can save a ton of time.

Without this automation, you would have to manually send out each email, which would take up a lot of your time. Because not only do you have to write the email, but you also have to enter in each customer’s information.

Another common example of process automation is social media scheduling. If you’re running a business, chances are you need to post regularly on social media in order to keep customers informed and engaged.

Rather than manually scheduling each post, you can use a service like Buffer to automatically schedule your posts in advance. This way, you don’t have to worry about forgetting to post or struggling to come up with content every day.

Project Process Automation

Process automation & your next project…

Who’s doing what, and when will they have it finished? As teams grow, it can become harder to keep track of those oh-so-important details. Process automation can help by automating mundane tasks like collecting feedback, or keeping an eye on deadlines.

Honestly, process automation is a project manager’s best friend. Just like having your own personal assistant, process automation can take care of all the little mundane details that you don’t have time for. It can keep track of tasks, deadlines, and more so you don’t have to.

Think of it as a helpful robotic assistant that never tires, never slows down, and never takes a break. It can make sure tasks are completed on time and keep everyone in the loop about progress.

Just remember, your only as good as the tools you have. So make sure to invest in quality automation software so that it can help streamline your workflow and keep you on top of all the moving parts of your projects.

Process Automation to Save Time

How Process Automation Can Help You Save Time

As we mentioned before, one of the biggest benefits of process automation is that it can save you time. But how exactly does it do that?

Well, think about it this way: if you’re spending two hours every day on tasks that could be automated, that’s 10 hours per week—40 hours per month. That’s a lot of time that could be spent on more productive activities.

Not to mention, process automation can also help you avoid human error. We’re all susceptible to making mistakes, but if a task is automated, there’s no chance for human error. This is especially important for tasks that require attention to detail, like data entry.

Why Process Automation is Crucial

Several reasons why it’s crucial for your projects…

In addition to saving you time and reducing the chances of human error, process automation can also help you:

  • Save money
  • Improve customer service
  • Increase efficiency
  • Scale your business

Save money

Process automation can also save you money. For example, if you automate customer onboarding emails, you’ll spend less time writing and sending individual emails. Or, if you use a chatbot on your website instead of hiring a customer service representative, you’ll save money on salaries and benefits.

Improve customer service

Process automation can also help you improve your customer service. Especially if you use technological tools like chatbots to interact with customers. Not only will this free up your time, but it will also allow you to provide 24/7 customer service.

Plus, if you use a tool like Intercom, you can automatically send custom messages to people based on their behavior on your website. So, if someone abandons their shopping cart, you can send them a discount code to encourage them to come back and complete their purchase.

Increase efficiency

Another benefit of process automation is that it can help you increase your efficiency. By automating tasks, you’ll be able to get more done in less time. And, as we all know, time is money.

Plus, if you automate repetitive tasks, you’ll free up your brain power to focus on more important tasks. This is especially beneficial if you work in a creative field like marketing or advertising.

Scale your business

Process automation can help you scale your business. If you’re manually doing tasks that could be automated, you’re only able to do as much as you can physically do in a day. But, if you automate those tasks, you’ll be able to do more without having to hire additional staff.

This is especially beneficial if you’re a solo-preneur or small business owner. Automating tasks will allow you to do more without having to take on the additional overhead of hiring employees.

Of course, there are some tasks that shouldn’t be automated. For example, if you’re a freelance writer, you probably don’t want to automate your entire writing process. But, there are some parts of your business that can be automated, like social media scheduling or invoicing.

Saves You Headaches In the Long Run

Not only can process automation save you time and money in the short run, but it can also save you headaches in the long run.

For example, if you automate your social media scheduling, you’ll never have to worry about forgetting to post or having to stop what you’re doing to post. And, if you use a tool like Hootsuite Insights, you can track your social media analytics and see what’s working and what’s not.

Plus, if you automate your customer onboarding process, you’ll never have to worry about manually sending emails or creating welcome packets. And, if you use a tool like Intercom, you can automate your customer support and never have to worry about responding to customer inquiries.

Downsides of Process Automation

What are the Downsides of Process Automation?

Of course, there are some downsides to process automation. For example, if you automate your social media scheduling, you won’t be able to post in real-time.

Plus, if you automate your customer onboarding process, you won’t be able to personalize the experience for each customer. And, if you use a chatbot to interact with customers, you won’t be able to build the same rapport as you would if you were speaking to them on the phone or in person.

To be honest, the main downside is cost. If you’re on a budget, the cost of setting up an automated system can be prohibitively expensive. But, there are some tools out there that are either free or have low-cost plans.

Finally, process automation can be time-consuming. If you’re not careful, you can spend more time setting up your automation than you would if you were doing the task manually. But, if you take the time to set up your automation correctly, it will save you time in the long run.

Phases of project management with automation

Considering the 4 phases of project management with automation

All projects, whether small or large, have four distinct phases. These include planning, execution, monitoring, and closure. Each of these steps is important in ensuring the success of a project.

Process automation can help streamline each step of the project management process, here’s how…

1. Planning phase

During the planning phase, or the initial phase of any project, the main objectives are identified, the scope of the project is defined, and resources are allocated.

In this initial phase, the major processes utilized can include figuring out a time frame, allocating a budget, measuring risk, and assessing resources. A huge part of this phase is spent on gathering data and then organizing it into useful information.

Process automation can help streamline the planning process by automating the data-gathering phase, which can be quite tedious and time consuming.

Automation tools can help collect and organize the necessary information quickly and efficiently, while also providing a platform for generating reports and insights.

2. Execution phase

The execution phase is the second step in any project and it’s when all of the planning comes to fruition. During this stage, tasks are assigned and resources are used to move forward with the project.

Automation tools can help streamline this process by helping to manage schedules, assign tasks, and track progress. Automated systems can also be used to send out reminders for upcoming tasks and deadlines.

3. Monitoring phase

In the monitoring phase, progress is tracked and reported on. During this stage, all team members can analyze the progress of the project, identify potential risks and issues, and adjust plans accordingly.

Automation tools can help streamline this process by providing real-time data, tracking progress, and analyzing results. Automated systems can also be used to generate reports which can be shared with team members.

4. Closure phase

The closure phase is the final step in any project. During this stage, all of the tasks and objectives are completed and resources are released. The goal is to make sure that all goals have been met and all stakeholders are satisfied with the outcome.

Process automation can help streamline this process by automating some of the final tasks such as archiving documents, sending out final reports, and releasing resources.

Utilize Project Automation for Your Team

How to Utilize Project Automation for Your Team

Now that you’ve seen the potential benefits and downsides of process automation, you might be wondering how to get started. The good news is, it’s not as difficult as you might think. All you need to do is to…

1. Define Your Goals

First, you need to figure out what tasks you want to automate. Look for tasks that are repetitive or time-consuming.

For example, if you’re a freelance writer, you might want to automate your invoicing process. Or, if you’re a small business owner, you might want to automate your social media scheduling.

2. Choose Your Tools

Once you’ve defined your goals, it’s time to choose the tools you’ll use to automate your tasks.

We recommend finding a tool that specializes in automating projects and processes. There are a variety of tools available, so you’ll want to shop around and find one that has all the features you need.

A tool like Teamly could be perfect. Its user-friendly kanban boards can really help prevent work from being lost in the shuffle. With Teamly’s boards, users can create customized workflows, assign tasks, and automate repetitive activities. It’s like the best of both worlds – automation and organization.

But what if your managing social media posts and want to save time on the same? Automation tools like Buffer, Hootsuite or SocialPilot can help you schedule posts in bulk and even track their performance.

What if you are managing customer support? Tools like Zendesk or Help Scout can help you automate customer support tickets and provide better customer experience. With customer support we always recommend having a human representative on standby to answer difficult queries, however, process automation can certainly help streamline the process. Especially when we’re talking about common everyday inquiries.

3. Establish Rules

The next step is to establish rules or parameters for the automated processes. This will help ensure that everything is running smoothly and you don’t run into any unexpected issues.

For example, if you’re automating your customer support process, you’ll want to set rules for how quickly inquiries should be responded to, who is responsible for responding to them, and what types of inquiries are considered urgent.

By setting these rules and parameters in advance, you can help ensure that your automated processes are running smoothly.

4. Monitor and Adjust

Finally, you’ll want to monitor your processes and adjust them as needed. Process automation can help save time in the long run, but that doesn’t mean it’s a set-it-and-forget-it kind of thing. You’ll still need to keep an eye on things to make sure everything is running as expected.

Think of process automation like a car. You can set it up and program it to do what you want, but you still need to make sure that the oil is changed and the brakes are in good condition.

Takeaways

Process automation is a great way to save time on repetitive tasks, increase efficiency, and improve customer service.

It’s easy to get started with process automation – all you need to do is define your goals, choose the right tools for the job, establish rules and parameters, and monitor and adjust as needed.

So if you’re looking for a way to streamline your processes and free up some time in your day, process automation is definitely worth considering. Ready to get started? Put the pedal to the metal and let’s go!

Project Best Practices: How to Use Smoothing in Resource Management

Resource Smoothing

Project planning is a long process. Even after huge milestones are met, things are usually still in a tangle. Getting everything firmly into place requires several more yanks with a fine tooth comb.

Gathering all the requirements and then defining the project’s scope is a significant threshold, for sure. Yet, during the process of allocating resources, it often becomes apparent that things are really out of whack.

Some people may be working several twelve hour days, with huge breaks in between, while others are assigned to two tasks at the same time. Plus, the equipment may not be available when it’s needed.

There’s still a lot to smooth out.

This final stage of teasing things out is known as resource allocation. After extending the project schedule if need be, it’s all about distributing resources in order to suit people’s desires and preferences. The two techniques used in resource allocation are known as resource smoothing and resource leveling.

Are you wondering more about resource smoothing in project management? This post examines resource smoothing within the broader framework of resource management, and compares it to resource leveling.

Resource Management

Resource Management: Process & Strategies

Resource smoothing is a central technique in resource management. Before discussing resource smoothing, then, it’s helpful first to clarify everything included in the term resource, and briefly explain the resource management process.

Resource: A Definition

In project management, resources refer to many things, including people, objects, and money.

The PM Glossary defines it as: “The elements needed for a project to successfully meet its objectives. Examples of resources include equipment, staff, locations, facilities, and money.”

Resources include the equipment needed to complete a project, as well as the materials within the final project. They also include everyone who works to bring a project to completion.

For example, in a construction project, resources include the backhoe used to excavate the property, the concrete used in the foundation, as well as both the contract labor and the salaried employees. It includes the money to pay for it all, as well.

Resource Management: The Process

Resource management is all about when you use resources within a project, and how they’re used. It is a process that begins with planning all the necessary resources, then continues with both scheduling and allocating them. Let’s look at some preliminary steps to developing a resource management plan, in order to identify where project smoothing occurs in the process.

Project's Scope

1. Determine the Project’s Scope.

Once all the requirements have been collected by the stakeholders, it’s possible to determine the project’s scope. Using the timeline, the budget, and the requirements, the scope is outlined in a scope document that clarifies the requirements, constraints, exclusions and assumptions.

2. Create a Work Breakdown Structure (WBS).

A work breakdown structure displays all of the work packages required to fulfill the project’s requirements. It is created by decomposing a project’s high level requirements into increasingly smaller tasks. It clarifies all of the project’s required resources.

3. Determine Required Resources.

Using the small tasks at Level 3 and Level 4 of the WBS, it’s possible at this point to determine all the resources required to complete a project, including the supplies, equipment, labor and money.

4. Use Resources Allocation Strategies.

Even though the resources required to complete the project are clear, there are still a lot of things to smooth out.

When tasks and resources are laid out onto a project’s schedule, all sorts of conflicts become apparent. Some people have been over allocated to various tasks. In other instances, equipment and materials won’t be available at the scheduled time.

This is the stage for applying resource allocation strategies.

What is resource allocation? The Project Management Glossary defines it as: “The assigning and scheduling of resources for project-related activities, ideally in the most efficient manner possible. Resource allocation is typically handled by a project manager, though they may be overridden by a program manager if resources are to be shared between multiple projects.”

As previously stated, resource smoothing is one of the two central resource allocation techniques.

With these clarifications, it’s time to discuss resource smoothing.

What is Resource Smoothing

Resource Smoothing: Definition & Benefits

Resource smoothing is a method for optimizing resources and equally distributing them throughout a project.

The Project Management Glossary defines it as: “A technique that makes use of float when allocating resources so as not to affect total project duration. It is used when project time constraints are important. Resource smoothing does not affect a project’s critical path.”

Resource smoothing does not extend a project’s completion date. After it’s utilized, that is to say, the critical path remains the same. Rather, this allocation technique focuses on non-critical activities, those with float or slack.

Float or slack are basically the same thing. They are a measurement of an activity’s wiggle room. The Project Management Glossary defines each as:

Slack time – The length of time an activity’s early start can be delayed without affecting project duration.

Float – A measure of the schedule flexibility involving a particular task.

For example, say an eight hour project needs to be completed within one week. Its slack, or float, would be four days. Slack and float can also be measured in hours.

Resource smoothing cannot be not delayed any longer than an activity’s total float. Using the previous example, this means the activity cannot be scheduled during the following week without impacting the critical path, and causing delays to other activities.

Resource Smoothing Histogram

As displayed by this histogram, smoothing evens out resources within a project without extending the project.

Smoothing isn’t so much about constraints, that is to say, but it’s about desired limits. It’s about making resources sensibly distributed within the constraints of the critical path.

Benefits of Smoothing

Smoothing doesn’t always work. When two activities have hard dependencies, for example, things cannot be shifted around. But when it is possible, smoothing a project provides several clear and tangible benefits.

1. Prevents Burnout

Most people are willing to work 40 hours in a week. At the same time, most people get burnt out from a 12 hour workday. A lopsided work schedule quickly leads to a place of burnout and exhaustion.

Smoothing is about distributing and equalizing work. If all the work for one week is scheduled from Monday to Wednesday, for example, smoothing distributes the work into the final two weekdays as well, in order to create a more rounded schedule.

2. Prevents Overuse of Equipment

Smoothing encourages the moderate use of equipment. When a project has been smoothed and resources equally allocated, it precludes a scenario where equipment gets overused and worn down quickly.

3. Improves Company Culture

Work-life balance is one of the pillars of a healthy workplace culture. Smoothing respects work and life boundaries, and creates an environment where people have time for work and for the rest of their life as well.

As explained, smoothing doesn’t consider a project’s constraints. Rather, it quite literally smooths things out, within the given constraints. It’s like smoothing out a sandbox with a little rake. Nothing goes beyond the walls of the sandbox, but everything within it gets leveled out.

An example of smoothing helps to demonstrate where and how it works within a project.

Resource Smoothing Example

Example of Resource Smoothing

Let’s look at an example of a kitchen remodel that has three principle installation tasks. The backsplash, the cupboards, and the refrigerator all need to be installed by the end of the week. One person is hired to complete the cabinets, while a second is hired for the second two tasks.

The cupboards take 40 hours to install, while the backsplash and the refrigerator each take 10 hours. The second two tasks, then, each have 30 hours of float.

Originally, the refrigerator and the backslash are scheduled to be completed on Monday and Tuesday, in 10 hours each day. The cupboards are to be installed over the entire week, in equal increments of time.

However, upon closer examination, the resource manager decides to disperse the backsplash and refrigerator installations over the entire week, utilizing the float for each task. Monday and Tuesday are dedicated to the backsplash, with five hours each day, and Wednesday and Thursday are dedicated to the refrigerator, again with five hours each day.

The benefit or objective of smoothing is to find breathing space in a schedule. Shifting activities with float evens out work schedules so that a more equal amount of work is completed on each day of the project. It doesn’t change the critical path, or the overall timeline of the project.

Resource Leveling

Leveling: The Other Resource Allocation Technique

Sometimes when a project manager takes a closer look at a project’s critical path, it becomes clear that things need to shift around. For example, maybe two tasks scheduled in parallel require the same person to work for eight hours. Clearly, these two tasks need to be scheduled in sequence. If one task is on the critical path, this extends the critical path by eight hours.

This demonstrates a resource allocation technique known as leveling.

Resource leveling is defined as: “A technique that involves amending the project schedule to keep resource use below a set limit. It is used when it is important to impose limits on resource use. Resource leveling can affect a project’s critical path.”

Resource leveling focuses on resources with constraints. Sometimes a resource is only available at a certain time, or in certain amounts. When this scarcity is taken into account, it can impact the project’s timeline and its critical path.

Leveling and smoothing are both integral to the resource management processes, in seeing that all resources in a project are properly scheduled and distributed.

Resource Leveling and Resource Smoothing

Leveling and Smoothing: Comparison and Contrast

Leveling and smoothing both focus on resource allocation, but each function a little differently. Let’s compare and contrast the two.

Constraints versus Desires

Resource leveling is driven by constraints, while resource smoothing is driven by desires. Another way to say this is that leveling is a must, and smoothing is a should.

Resource leveling means the reallocation of resources when there is no other option. For example, if a task is scheduled for Monday, but the necessary equipment is only available on Tuesday, then the task must be moved to Tuesday.

Resource leveling, rather, caters to preferences. It’s about evening things out so that no one is burdened with a heavy workload, and no work schedules are lopsided.

Leveling Before Smoothing

When firming up a project’s schedule, the process of leveling is applied before smoothing. This determines the final critical path.

Once the path is in place, it’s then possible to find activities with float, and smooth out the resources wherever possible.

Leveling May Increase the Schedule

Leveling affects the critical path and so it usually increases the project’s schedule. Smoothing is only applied to non-critical activities, or those with float. Smoothing maintains all of a project’s time and budget and scope constraints, and moves things around within them.

Conclusion

Now that we’ve gone over the basics of smoothing and resource management, here’s a question: Is the project manager a resource to manage?

That’s a bit of a stumper.

But back to the central point: project smoothing is about meeting desired limits, rather than hard constraints. It’s about addressing a project with moderation and creating a positive work scenario that uses equipment prudently and respects work-life balance.

Do you ever wish you could have a four-day work week? Resource smoothing seeks to meet this kind of desire.

Along with the technique of resource leveling, a project manager uses resource smoothing to get all of the pieces in place to begin a project.

If you’re scheduling resources for a remote project, consider using Teamly. This intuitive project manager software allows you to visually display all of a project’s tasks and timelines for easy scheduling and organization. Visit us and sign up today!

Hopping From Lily-pad to Lily-pad: Managing a Project End-to-End

End to End Project Management

Have you ever set your mind to complete a DIY home remodel, and the very next day you started ripping out tiles and pulling up carpeting? When you’re really excited about an undertaking, the inclination to dive right in is almost irresistible.

Yet, when a project executes before outlining the budget, the requirements and the scope, it’s usually a setup for failure.

When we get ahead of ourselves, the project becomes a whirlwind. You don’t know where to turn, what to work on, or what success even looks like. You may tear out a wall, only to discover that you don’t have the budget to replace it. Or begin an ambitious remodel that ends up taking so long it’s never really finished.

Fortunately, there’s a system for having things in place to execute a project at the proper time and build the deliverable of your dreams.

End-to-end (E2E) project management breaks a project down so that you know exactly what to do and when. It’s a formula for delivering a quality product, every time.

Wanna know more about the meaning of end-to-end project management, and the stages of a project lifecycle? That’s what this post is all about.

What is E2E Project Management

E2E Definition & Benefits

End-to-end project management is a methodical process for moving through a project from the beginning stages all the way to completion. It breaks a project down into key stages, and identifies all the tasks and objectives for each stage. The process creates a continuous workflow, as it sufficiently prepares the project to move into each successive stage.

Here are some of the central promises of end-to-end planning:

The Project Stays Within Its Constraints

End-to-end planning creates orderliness and deliberation. Things are carefully planned and monitored, and so it increases the odds that a project is completed within its stated scope, budget and timeline.

The Project Manager Grows and Improves

With end-to-end planning, a project manager takes plenty of time to reflect and analyze systems at every stage of a project. This creates opportunities to improve and update processes with every go-around.

It Decreases Rework

End-to-end planning is an efficient process. It encourages continual communication so all team members are in alignment and working toward the same objectives.

As you can see, end-to-end project management delivers clear benefits to a project. The following is a summary of each project stage in the end-to-end cycle, including the key objectives of each stage.

E2E Project Management Initiation Stage

1. Initiation Stage

In this first stage, the project manager seeks to define the project and determine whether or not to take it on.

Define the Project

The first step is to clarify the project in general terms, identifying first the objective, the timeline and the budget, and then gaining a rudimentary estimation of the scope. These are broad estimations; the particulars are spelled out later.

For example, if the project is a home remodel, this stage clarifies the key objectives, such as refinish the basement, add a bathroom and knock out a wall to expand the living room.

Feasibility Study

A feasibility study, as the name suggests, determines if the project can succeed, given its objective and constraints. It primarily focuses on the cost of the project and the value of the final deliverable.

A feasibility study answers questions such as:

  • Do we have the resources (labor, equipment and materials) needed to achieve the proposed objective?
  • Does the return on investment justify the costs?

A feasibility report includes breakdowns of the project’s cost, alongside the anticipated income.

Identify Stakeholders

The initiation stage also clarifies everyone involved in the project. Who is invested in the outcome, and whose input needs to be considered in the discovery stage?

Select Tools

At this point, it’s necessary to outline what communication tools and software to use for the project. A remote project requires special attention at this phase, as the quality of the communication is directly determined by selecting user-friendly tools.

In summary, this initial stage again is about gaining a broad overview of the project. It paints with a broad brush. This stage seeks to develop a framework for the project, define stakeholders, outline resources, clarify objectives, and then determine whether or not it makes good business sense to move forward.

E2E Project Management Planning Stage

2. Planning Stage

The planning stage lays a foundation for a project and creates a roadmap for the team to follow.

A solid plan places the project in a position to succeed.

Although a thorough plan is a lot of work, the effort is worth it. Working through the details minimizes scope creep, gets everyone in agreement on project goals, and clears up assumptions and miscommunications.

Here are the central components of the planning stage.

Business Case

A business case states the justification for the project. Among other criteria, it outlines the project in terms of the objective, the benefits and the cost.

Procurement Strategy

A procurement strategy goes hand-in-hand with the business case, as it outlines how the project plans to obtain the required labor, equipment and materials within the project’s scope and cost.

Requirement Summary

A thorough understanding of all requirements is necessary before beginning a project.

There are several methods for capturing requirements, including a MoSCoW meeting, where stakeholders distinguish musts from shoulds, and a user story session, where all stakeholders write out requirements individually.

Whatever method is used, the objective for the project manager is to communicate with all stakeholders, and develop a clear understanding of what the project seeks to accomplish, both in terms of the “what” and the “why.” That is to say, this stage identifies both the tangible deliverables and the value that these deliverables seek to add.

Scope Summary

A scope summary defines the scope of a project, using the project’s requirements. It includes assumptions, exclusions and a list of all requirements. A thorough scope document is the surest way to avoid scope creep during the project’s execution stage.

Work Breakdown Structure and Resource Schedule

A work breakdown structure (WBS) uses both the objective and the high level requirements to break the project down into smaller work packages. These work packages spell out all of the resources needed for the project, including the equipment, the labor, the materials, the location and the fees.

The project manager identifies the relationships between each of the work packages, to create a critical path. She or he assigns roles to all the team members and creates work flows.

Wherever possible, the project manager also applies the strategies of smoothing, leveling, crashing and fast-tracking in order to create efficiencies in the schedule.

Change Management Plan

Even though the planning stage seeks to clarify objectives and reign in scope creep, changes are bound to occur in the project nonetheless. Creating a change management process allows the team to properly document changes as they occur during the project’s execution.

Project Management Methodology

The project manager also determines a methodology for managing the project during the planning stage. The nature of the project itself often determines which structure to choose. A project with high risks and upfront costs often leans toward a more waterfall approach, while a project that can pivot easily takes a more agile approach.

Risk Management Plan

A risk management plan carefully examines the project and anticipates all possible occurrences, both positive and negative. The plan also considers the likelihood of each occurrence. For example, a winter construction project would anticipate inclement weather, and place a high probability on this occurrence.

A risk management plan may sound silly to some, as it anticipates issues that may or may not occur. However, ultimately it saves the project time, money and resources.

When the vulnerabilities and threats for each asset have been identified, the next step is to determine how to handle them. Risks can either be avoided, transferred, accepted, or mitigated.

It also includes a succession plan, in the event a team member leaves during the execution stage.

Plan Kickoff Meeting

Finally, when the planning is complete, it’s time to set up a kickoff meeting to share the plan with all stakeholders. The kickoff meeting carefully outlines all the deliverables, presents the WBS and resource schedule, and calls attention to risks.

The agenda for the meeting includes outlining the deliverables, sharing the schedule, and soliciting feedback. Ideally, it’s scheduled at a time and place where all stakeholders can attend.

As you can see, the planning stage thoroughly looks at all aspects of a project, to be sure it commences without a hitch. Now it’s time to move onto the execution stage!

E2E Project Management Execution Stage

3. Execution Stage

The next two stages of the project management cycle are the longest, and they are performed simultaneously.

The third stage puts the project into action, and begins with a kickoff meeting.

Kickoff Meeting

Execution begins with a meeting that shares and discusses all of the documents and discoveries from the planning stage. The objective is to get everyone on the same page as to what the project aims to achieve, and how it aims to achieve it.

Particular attention is given to the project requirements, the timeline and the procurement strategy.

It also solicits stakeholder feedback and seeks to identify and clear up any last-minute miscommunications and assumptions.

Execute on the Plan

‘At this point, the team works to deliver requirements to the client. Depending on the project, the execution plan may last quite some time. Whenever possible, the requirements are presented in incremental stages, in order to collect feedback. Oftentimes, the team reflects on client feedback and changes course if need be.

The team works hard during the execution stage. Depending on the project management strategy, the team may continually meet in sprint sessions and scrum meetings, or else follow a carefully laid plan on a gantt chart. Either way, the objective is the same: To fulfill requirements within the given scope, timeline and budget.

E2E Project Management Monitoring Stage

4. Monitoring Stage

Monitoring is critical to the successful execution of a project. The objective of the project manager at this stage is to supervise the team and determine if the project is on track with the given budget, timeline and resources.

At this point, many of the processes outlined in the development stage are put into action. Some central components of the monitoring stage include:

Scope Management

Scope management aims to avoiding incidents of gold-plating and scope creep, two forms of undocumented changes to the project’s requirements.

This entails keeping close supervision on the team, to be sure everyone works toward fulfilling requirements exclusivity, with no add-ons. It also means ongoing communication with the client to identify and approve changes, and ensure they’re incorporated into the change process.

Change Management

As mentioned, changes are bound to occur in a project. Sometimes the change is a recovery plan, intended to get a delayed project back on track. At other times, the change is an adjustment to the deliverables, based on client feedback.

Ongoing communication with team and client determine when and if the change is needed. Following the change processes outlined in the planning stage ensures the changes are documented and integrated into the project schedule and resource plan.

Risk Supervision

A project manager follows the risk management plan and monitors the project for upcoming risks. The plan is also updated to include new risks assumed by changes to the project, or the addition of new requirements.

Daily Scrum Meetings

Ongoing communication is central to successfully monitoring a project. Ideally, a team meets every day to discuss the work plan, and align efforts to the overall project goal.

This is also an opportunity to air concerns about risks, discuss feedback from the client, or suggest changes to the project.

Final Deliverable Sign-off

When the client signs-off on the final deliverable, both the monitor and the execute stage come to an end. Everyone drinks a glass of champagne, and toasts to their hard work.

E2E Project Management Closure Stage

5. Closure Stage

In addition to popping a bottle of champagne, there are still some loose ends to tie up in the final stage of a project.

Post-Mortum Meeting

A post-mortum meeting acknowledges the hard work from key players and the significant milestones the team achieved together.

It’s also an opportunity for the team to share feedback on various processes and procedures used during the project. These suggestions indicate how to improve the next time around.

Reflect on Processes and Systems

This is an important stage for the project manager to reflect on what worked well in the project and what did not work so well, with particular focus on the following areas:

  • Communication methods
  • Scope document template
  • Requirements gathering method
  • Project management method
  • Change management plan
  • Risk management plan

A careful reflection creates a window of opportunity to improve processes for the next project.

Close the Books

And finally, it’s time to take inventory, store files and share results with all necessary stakeholders.

Conclusion

Just like the various stages of our lives, a project also has a lifecycle with clear stages.

We complete school, we enter out of childhood and into adulthood. And a project progresses from the idea, to the plan, to the execution, and finally to the completion.

In order to move successfully from one stage into another, it’s necessary to determine milestones for each stage. Without end-to-end management, the project ends up being a confused, muddled mess.

If you’re managing a remote team, the planning, monitoring and executing are no cinch, that’s for sure. Consider signing up for Teamly, the intuitive project management software that allows teams to interact daily in video chat, messages and online meeting spaces.

9 Essential Tips for Creating an Elite Customer Service Team

How to Build a Customer Service Team

Are you overwhelmed by the thought of building a customer service team from scratch? Or maybe you’re not sure where to start? Don’t worry, we got you covered.

Building a top-notch customer service team doesn’t have to be difficult. With the right strategy and plan in place, you can create a world-class customer service team that will keep your customers happy and coming back for more.

In this article, we’ll show you how to build a customer service team that will exceed your customers’ expectations. We’ll cover everything from finding the right people to training and managing your team.

By the end, you’ll have all the information you need to build a customer service team that’s second to none. So, let’s get started.

Build your customer service team

Build your customer service team for success…

Here’s a scenario: You’ve just launched your product and there’s a steady stream of customers coming in. But as the number of customer service inquiries grows, you quickly realize that you can’t handle it all yourself.

It’s time to build a customer service team. But where do you start? And how do you set up your team for success? Here are 9 helpful tips to help you build a customer service team that’s second to none:

1. Outline your customer service department’s vision and goals.

Have you ever had an experience where customer service was so good that it left a lasting impression on you? Maybe you called customer service with a problem and the representative went above and beyond to help you. Or maybe you had a great experience using a company’s live chat feature.

Whatever the case may be, those companies had a clear vision for their customer service departments. And that’s what you need to create a successful customer service team.

Here are some questions to ask yourself when outlining the vision for your customer service team:

  • How do you want your customers to feel when they interact with your company?
  • What type of customer service experience do you want to provide?
  • What journey do you want your customers to take?

Answering these questions will help you create a clear vision for your customer service team. And that vision will be the foundation for everything else you do.

2. Recruit the right customer service representatives.

Now that you have a vision for your customer service team, it’s time to start recruiting the right people.

Finding talent can be extremely challenging, especially when you’re looking for customer service representatives. But there are a few things you can do to increase your chances of finding the right people.

Here are a few tips for recruiting customer service reps:

  • Create a detailed job description: When you’re writing the job description, be sure to include information about the type of person you’re looking for.
  • Include personality traits, skills, and experience levels that would make someone a successful customer service rep.
  • Use employee referrals: Employee referrals are one of the best ways to find qualified candidates. And they’re also more likely to stick around longer than other employees.

The skills your looking for in an employee referral may be different than what you would typically find in a job posting. But that’s okay.

You’re looking for customer service reps who are passionate about providing great customer experience and are willing to go the extra mile for your customers.

Tone for customer interactions

3. Set the tone for customer interactions.

It would super tempting to write a long list of rules and regulations for your customer service team. But resist the urge.

Instead of creating a bunch of rules, set the tone for customer service interactions. How you want your team to interact with customers should be based on your company’s values.

For example, if one of your company values is “be helpful,” then your customer service team should be trained to provide helpful solutions to customer problems. So be sure to keep your company values in mind when setting the tone for customer interactions.

You might be thinking , “What exactly is tone?”

Tone is the way you communicate with someone. It’s the attitude and feeling that comes across in your words and actions. And the tone you set will be reflected in the way your team interacts with customers. So if you want your team to provide world-class customer service, be sure to set the tone accordingly.

Here are some common tones, that customer service teams can set:

  • Friendly
  • Empathetic
  • Helpful
  • Calm
  • Enthusiastic

4. Teach your team active listening skills.

Active listening is a communication method that demands the listener to fully engage with the person speaking. This means giving your undivided attention to the person, and not interrupting them while they’re speaking.

It also means paraphrasing what the person has said, to ensure that you understand them correctly. And not jumping to conclusions or trying to fix the problem before fully understanding it.

Active listening is an essential skill for customer service representatives. And it’s something that needs to be taught and practiced.

Picture this : You’re on the phone with a customer service representative and you can tell they’re not really listening to you. They keep interrupting you and trying to fix the problem before you’ve had a chance to explain it. It’s frustrating, right?

Active listening is the opposite of that. When you’re an active listener, you give the customer your full attention. You let them finish explaining the problem before you start trying to solve it. This makes the customer feel valued and appreciated, and it helps you resolve the issue more effectively.

Here are some tips for teaching your team active listening skills:

  • Encourage your team members to ask questions if they need clarification. This shows the customer that you’re interested in helping them and that you want to fully understand the problem.
  • Ask open-ended questions to get more information from the customer.
  • Empathize with the customer and let them know you understand how they feel.
  • Paraphrase what the customer has said, to ensure that you understand them correctly.
  • Avoid interrupting the customer while they’re speaking.
  • Don’t jump to conclusions or try to fix the problem before fully understanding it.

You can also hold training sessions on active listening. During these sessions, role-play different customer service scenarios. This will give your team members a chance to practice active listening in a safe and controlled environment.

Teaching your team active listening skills will help them understand the customer’s issue and find a resolution more quickly. It will also help diffuse difficult situations and build trust with customers.

Help your team members identify their triggers

5. Help your team members identify their triggers.

We all have triggers–things that set us off and make us react in a negative way. It’s important to help your team members identify their triggers so they can be aware of them in customer service interactions.

If you can help your team members identify their triggers, they will be better equipped to deal with them in customer service interactions. They will also be able to take steps to avoid or manage situations that might trigger a reaction.

Below are common triggers and some tips for dealing with them:

Feeling ignored or dismissed

If you feel like the customer is not listening to you or taking you seriously, it’s important to stay calm and try to understand their perspective. It can be helpful to restate what the customer has said in your own words to show that you’re listening and trying to understand.

Feeling attacked or criticized

If the customer is being confrontational or critical, it’s important to stay calm and try not to take it personally. Try to understand why the customer is feeling this way and see if there’s anything you can do to help.

Feeling overwhelmed or stressed

If you’re feeling overwhelmed or stressed, it’s important to take a step back and take a deep breath. You might also want to try some relaxation techniques, such as progressive muscle relaxation or mindfulness meditation.

Being yelled at

If the customer is yelling, it’s important to stay calm and try to understand why they’re feeling this way. It can be helpful to restate what the customer has said in your own words to show that you’re listening and trying to understand. You might also want to offer to help the customer with their issue

Having to wait too long for a response

If you’re feeling impatient, it’s important to take a deep breath and remember that the customer is probably feeling just as frustrated as you are. Try to be understanding and empathetic.

Give your team the technical tools

6. Give your team the technical tools they need to succeed.

At its best, customer service is the glue that holds a business together. It’s the human element that can turn a one-time customer into a lifelong advocate. But delivering great customer service takes more than just having friendly representatives. It takes having the right tools in place so your team can do their job efficiently and effectively.

Think of your customer service team as surgeons. Would you want your surgeon operating on you with a rusty old scalpel that hasn’t been sharpened in years? Of course not! You want them to have the best tools available so they can do their job properly. The same goes for your customer service team.

Here are four essential tools your customer service team needs in order to be successful:

CRM system

A CRM (customer relationship management) system is a tool that helps businesses manage their interactions with current and potential customers. A good CRM system will help your customer service team keep track of customer inquiries and requests, issue resolutions, order history, and contact information. This information is important because it helps your team provide faster and better resolutions, prevent issues from falling through the cracks, and proactively reach out to customers before problems arise.

Live chat tool

A live chat tool allows your customers to get in touch with your customer service team in real-time via chat message rather than having to wait on hold or sending an email inquiry. This is important because it provides customers with a faster way to get answers to their questions or resolve their issues, which leads to happier customers! In addition, live chat also gives you the ability to collect valuable data about your customers’ needs and pain points so you can make improvements to your products or services.

Knowledge base (Essential information)

A knowledge base is essentially an online library of articles, FAQs, and other resources that your customer service team can refer to when they need help resolving an issue. This is important because it helps reduce the amount of time spent on each call or chat, which leads to higher efficiency and productivity for your team. In addition, a well-organized knowledge base can also help reduce instances of “support ticket creep”—when support tickets keep getting re-opened because the original issue was never fully resolved.

Reporting tools

A reporting tool allows you to track various metrics related to your customer service team’s performance, such as average resolution time, abandonment rate, first contact resolution rate, etc. This information is important because it helps you identify areas where your team needs improvement so you can make changes accordingly. It also helps you benchmark your team’s performance over time so you can see how they’re improving (or not).

Encourage your team to use positive language

7. Encourage your team to use positive language.

Have you heard of the science experiment with plants and the effects of positive language? There were two groups of plants both were treated equally, except for the words that were said to them.

One group was praised with positive words and the other group was scolded with negative words. The plants that were praised grew taller, had healthier leaves, and produced more flowers. The plants that were scolded had stunted growth, unhealthy leaves, and produced fewer flowers.

The same goes for your customer service team. When they use positive language, it has a positive effect on them, which in turn has a positive effect on their interactions with customers.

Here are some words and phrases to encourage your team to use:

  • “That’s a great question!”
  • “I’m happy to help you with that.”
  • “Thank you for bringing that to our attention.”
  • “I’m sorry to hear that you’re having trouble.”
  • “Let me see if I can help you with that.”
  • “Is there anything else I can help you with today?”

8. Teach your team how to de-escalate difficult situations.

Unfortunately, not every customer interaction is going to be pleasant. There will be times when customers are angry, upset, or just plain difficult to deal with. That’s why it’s important for your team to know how to de-escalate these types of situations.

Here are a few tips:

  • Remain calm and avoid getting defensive.
  • Empathize with the customer and try to see things from their perspective.
  • Don’t make promises you can’t keep.
  • Acknowledge when your company dropps the ball.
  • Apologize if appropriate.
  • Focus on finding a resolution rather than winning an argument.

Encourage your team to take breaks

9. Encourage your team to take breaks.

No one can be expected to be 100% all the time. There will be days when team members are struggling and that’s okay. What’s important is that you have a plan in place to support them so they can continue delivering great customer service.

After-all, happy team members lead to happy customers.

Here are a few ways you can support your team:

  • Make sure they have access to mental health resources.
  • Lead by example and practice self-care yourself.
  • Encourage them to take breaks when they need it.
  • Be understanding and flexible if they need to make adjustments to their schedule.

A word of caution: Don’t be too lenient with your team. Customer service can be a difficult job and you don’t want to end up with a team that’s burned out. Find a good balance between supporting your team and holding them accountable to their job responsibilities.

Bottom Line…

Sometimes when you’re in the weeds it’s easy to forget the forest. In order to build a successful customer service team, you need to have a clear vision, set goals, and put systems and processes in place to support your team. With the right foundation in place, you’ll be well on your way to building a world-class customer service team.

If your looking to keep your team organized and focused, you should check out Teamly’s intuitive project management software. Check us out today.

How to Avoid Scope Creep and Gold Plating in Project Management

Gold Plating vs Scope Creep

Most of us learn about scope creep and gold plating the hard way.

Maybe it’s a home remodel, and the project manager agrees to “just” add another sconce in the bathroom, which leads to a costly electrical repair and fifteen hours of work. Or an enthusiastic developer builds a close relationship with the client, and unbeknownst to anyone else, writes extra code that leads to hours of additional testing, developing and re-work.

Like a thick, enveloping fog, the aftereffects of scope creep and gold plating are upon us before we even know it.

Projects, oftentimes, commence with a wealth of assumptions and miscommunications. And it’s only in the execution that these become apparent. And so change is a part of every project, regardless. Scope management monitors changes, and ensures they don’t lead to re-work and free labor. A change management system is key to reducing scope creep and gold plating in a project.

In this post, we’ll look at the impacts of scope creep and gold plating, and explore how to mitigate them with a change management plan.

Scope Creep vs Gold Plating

Scope Creep vs Gold Plating

Scope creep and gold plating are similar in that they both are unmonitored changes in a project. They differ, however, in their causes and effects.

What Is Scope Creep?

Scope creep is an additional requirement, requested by the client, that is not included in the initial scope agreement. It may not affect the budget or the timeline.

Generally, as the name suggests, scope creep starts small but can grow much bigger. For example, the initial requirement may be to add some additional text to a webpage. Then, step by step, it increases to a new layout for the whole website.

Scope creep does not follow a change process. It’s an unauthorized and undocumented increase in the project’s scope.

What Causes Scope Creep?

Generally speaking, people are on the lookout for scope creep, as it creates tangles in a project. However, it almost always occurs anyway. Here are its three principal causes.

1. Poor Project Planning

Oftentimes, a project expands and changes because the scope was never clearly defined in the first place.

If the scope document fails to capture the requirements from every stakeholder, or describes each requirement vaguely, this usually means that the project will morph and change during the execution phase.

At other times, a project commences before the planning is complete. The procurement summary or work breakdown structure hasn’t been written, and so it’s unclear just how many resources a project requires. This creates inaccurate estimates that require updating during execution.

2. An Unsupervised Team

Scope creep also occurs when a project manager fails to keep abreast of the team and its interaction with the client. Sometimes a side relationship develops between the client and a team member, creating a channel for the client to solicit additional work without following proper change protocol.

3. A Client Likes What She Sees

Finally, scope creep can be a vote of confidence from the client. It means she likes the work she’s seen so far in the project, and wants more of the same.

What Is Gold Plating?

Gold plating is the addition of a feature to a project that is not requested by the customer, and is not in the original scope document. It’s intentionally added by the team and doesn’t follow any change procedure or protocol.

Gold-plating generally seeks to “spruce up” a project. For example, if the project is to paint a fence, the painter may decide to add a latch. When the client sees the final fence, he may or may not be pleased with the latch, as it wasn’t something he requested, nor was it part of the initial agreement.

What Causes Gold Plating

What Causes Gold Plating?

Generally speaking, a team works to fulfill the requirements outlined in the original scope document, and doesn’t color outside of these lines. So why then does gold-plating occur? There are two principal causes of it.

1. Compensation for Poor Performance

Oftentimes, when a team underperforms with a deliverable, it seeks to make up for the deficiency. Sometimes, the team erroneously thinks that adding a little extra to the project will smooth things over, or “gold-plate,” the situation.

2. A “Meet and Exceed Expectations” Mindset

Every project manager and team wants to build a strong reputation and to have returning clients. This drive to excel oftentimes results in overwrought efforts, including the addition of new requirements to the project.

It’s like ordering something in a restaurant and the waiter bringing you a complimentary side and salad, with the hope to receive a good online review. As anyone can see, sometimes this method works, and at other times, it backfires.

What Is the Difference Between Scope Creep and Gold Plating?

Scope creep and gold plating both are undocumented changes within projects, but they differ slightly from each other. Here are two key distinctions.

  1. Gold plating is an undocumented change that is not requested by the customer. It’s initiated by the team, and oftentimes is performed without the customer even knowing. Scope creep, on the other hand, is an additional requirement the customer wants to add to the project.
  2. The motivations and causes behind scope creep and gold plating are different. Scope creep is usually caused by misunderstandings and poor project planning. Gold plating, on the other hand, is usually an effort to stroke the customer. It’s an extra that’s intended to win favor or smooth things over.

Dangers of Scope Creep and Gold Plating

What Are the Dangers of Scope Creep and Gold Plating?

Both scope creep and gold plating impact a project negatively, and in similar ways.

1. Unplanned Risks

An additional requirement adds new risks to the project. For example, if the project is a home remodel and the additional work is an unplanned light fixture, this opens the project up to the risk of electrical problems.
This additional risk was never addressed at the beginning of a project, and so there is no plan in place for mitigating or avoiding it. It may lead to additional work and expenses.

2. No Documentation

A paper trail is always helpful, particularly in a long project. It keeps people on the same page with respect to expectations. However, gold plating and scope creep don’t use proper change management processes, and so they have no paper trail. This easily leads to major miscommunications.

How to Prevent Scope Creep and Gold Plating?

To a certain extent, changes in a project are guaranteed. Even with the best laid plans, things come up, unforeseen events occur and people change their mind. At the same time, there are several steps that a project manager can take to minimize changes in projects.

1. Write a Thorough Project Plan

The best way to rein in project changes is to have a clear understanding of the project at the beginning. A long one-on-one with the client helps to outline all of the requirements, eliminate misunderstandings and clear up assumptions.
The planning stage is also the time to educate the clients about the process, and outline the work and schedule with a work breakdown structure and a resource schedule.

Finally, a thorough scope document ensures that everyone is on the same page.

2. Supervise the Team

Close communication with the team also minimizes gold-plating and scope creep. A daily scrum meeting keeps everyone abreast of client requests and any proposed changes. It also allows the project manager to monitor the team, and ensure they’re focused exclusively on fulfilling requirements.

3. Have a Change Control Process

A simple change process that everyone understands ensures that nothing occurs without the entire team knowing about it. It also serves to minimize project risks and maintain a good paper trail.

Although change is always part of a project, these steps help to mitigate change and scope creep.

Change Management Plan

A Successful Change Management Plan

Eliminating undocumented changes in a project requires a change management plan. A process that documents changes and communicates them to the team keeps all the team’s efforts in alignment.

Let’s look at the benefits of a change management plan, and the four steps it includes.

Benefits of a Change Management Plan

A good change management plan keeps processes smooth during project execution. There isn’t any scope creep or gold plating when everyone understands what is expected, and knows the correct procedures for making a change.

It also minimizes waste, as the team only works on those activities that add value to the client.

Four Steps of a Change Management Plan

Although everyone participates in making changes, change management is the responsibility of the project manager. These are the four steps the project manager oversees.

1. Change Request

The first step identifies the request and the reason. This step can be initiated by any member of the team, or by suggestions or feedback from the client.

A suggested change may be a recovery plan, intended to get the team back on schedule. Or else, the change may be to modify a deliverable that performs poorly in testing.

It entails identifying the “what” of the change, and the “why.” This stage also documents how things need to change.

2. Change Analysis

Next, everyone on the team gathers to discuss the implications of the change. Particular feedback is sought from those with the most knowledge and those who are most affected by the change.

This stage considers the impact of the change on the budget, timeline and scope, as well as any new risks the change might introduce to the project.

It also considers alternatives to the change, perhaps to increase resources and crash activities instead.

3. Change Approval

If the project manager believes that the change is workable, then it is written up and approved, and assigned an effective date.

4. Change Implementation

The project manager oversees the change to be sure that the team is in alignment. He or she communicates the change to everyone and completes the documentation. The change is integrated into the project plan, and the resources are redistributed to accommodate it.

These are the principal steps to a change management plan. Managing scope creep and change requires discipline. This process makes the difference between a team that reacts to changes, and one that follows a plan.

These steps can look a lot different depending on the nature of the project and the team. The critical step is to determine a change management process at the beginning of a project, and communicate the processes to the entire team.

Scope Creep and Gold Plating

Conclusion

Projects take on life of their own. Even when everything is nicely set in place, the execution is always different from the planned scenario.

Change is about as certain as death and taxes, that is to say. It happens when a project is well defined, and it happens when a project is poorly defined.

However, a project manager can take steps to monitor and minimize change. Supervising a team is key to reducing gold plating, and a good change management process minimizes scope creep. Change management allows a project to remain within its initial constraints.

If you’re managing a remote team, supervision and communication are always a challenge. Check out Teamly, the project management platform that allows a team to keep abreast of one another, all day long.

How to Keep Your Bearings When a Valued Employee Suddenly Quits

When an employee quits

Do you know what happens when a homeowner removes a load bearing wall? The impact isn’t pretty. Walls crack, floors sag, doors won’t close, and in some cases the entire house buckles and falls to the ground.

It’s the very same thing when a key employee suddenly resigns. Maybe it’s a virtual assistant who knew all the ins and outs of your schedule, and worked tirelessly to keep your week on track. Or someone with that special combination of charisma and drive who you knew would someday be a star in upper-management.

In the aftermath of the departure, the framework of the organization sags a little. The work they once completed with so much panache is left undone.

It’s bewildering to have this support knocked out from under you. So many questions need to be answered: How to break the news to the boss and the team? Who will pick up the slack? When can someone be hired? And of course, how does this make you look as a manager?

And on top of it all, a part of you takes the resignation very personally. Even though it’s silly and unprofessional, you feel affronted. It must mean they didn’t like you.

Fortunately, there is a way to deal with a resigning employee that keeps the organization grounded and everything in-tact. In this post we’ll look at what to do when a key employee quits, plus a few ways to mitigate the impact when it happens again in the future.

Stem the Shock

Stem the Shock

Having an employee quit can leave you blindsided. They may have seemed so dedicated to the mission of the company that the resignation comes out of nowhere.

At the same time, every manager knows that even when someone loves their current job, moving on sometimes makes the most sense.

Getting to know employees both professionally and personally makes it easier to understand where they’re heading in their lives, and to sense if a big move looms over the horizon.

Here are two ways to identify with your employees and gauge where they stand in their current position.

Have Substantive One-on-Ones

Take the time to meet with your direct reports over lunch or coffee, just to talk and get to know them. Listen to their story to gain a picture of what the position means to them. Ask the bigger questions around what motivates them and where their passions lie.

Understanding employees on a personal level provides a barometer for where they are heading in life, and it’s easier to judge whether their current position will take them there.

Read People

Sometimes you feel the fatigue or boredom on a person. Just listening to the tone in their voice when they agree to work overtime indicates if they’re happy with the job or if they’ve had it.

This listening provides opportunities to have conversations at critical moments. When an employee’s frustration seems unsolvable, it doesn’t take a soothsayer to see that a resignation may well be in store.

Unfortunately, remote work environments challenge this ability to read people. Managing a remote team requires taking extra steps to engage in video calls and on conference platforms, in order to understand where people are, emotionally.

Thread the Needle

Thread the Needle

It’s stressful to receive an email from a direct report with the title “Got a sec”? Particularly with an employee you’ve worked hard to support, train and develop, it feels like a gut punch to have her say she’s moving on.

Although you may completely understand the motivations and even support the decision, it’s hard as a manager not to take a resignation personally.

A measured response that dances between personal and professional helps to ease the pain of the departure.

Be Human

When an employee up and quits out of nowhere, all sorts of questions arise. You’re probably wondering at what point he decided to make the move, and why? And why didn’t he ever reach out and talk to you about things?

In order to connect on a human level, it’s ok and even healthy to ask some of these questions outright. The answers may reveal stuffed feelings and buried issues, knowledge which can help you improve the work environment.

Be Professional

At the same time, it’s necessary to maintain a professional demeanor in the exchange. Although it might be tempting to start gushing out a response immediately, take in everything they tell you. Look to understand what motivated the resignation, then choose a response with care.

As their manager, be supportive of the decision, and communicate your appreciation for the time they’ve spent working for you.

Find a Place to Gush

You may feel gutted by the departure, but having a strong emotional reaction in the moment doesn’t help anybody. At the same time, allowing questions to fester and compound in your head isn’t healthy either.

Finding a colleague to share your surprises, anxieties, and disappointments allows you to channel your emotions constructively, and react with healthy objectivity.

Salvage What You Can

Salvage What You Can

Whenever a key employee quits, it means a huge loss for the organization. It’s not something to take lightly, and here are some measures to mitigate or possibly reverse the impact.

Show Your Hand

A resignation that comes out of nowhere may well indicate a communication failure between yourself and your direct report.

If an employee is willing, take him out of the professional environment, and talk to him just as a person. Over a glass of wine, tell him outright how you feel about his work, and where you believe he’s headed within the organization.

Do some digging to identify the principal reasons he’s chosen to move on. Is he bored with the position? Is it due to a personal conflict? Maybe he’s leaving for a job with less stress.

An open and honest conversation, where everything is laid on the table, helps you identify what isn’t working. Maybe there’s an opportunity to make a counteroffer. If you re-fashion the role into something more suited to his preferences, then everybody wins.

Although it may be too late at this point, extending a counteroffer is worth the effort. It ends the professional relationship on a positive note.

Patch Something Together

A resignation needn’t be seen as a funeral wake. Maybe you can’t convince the employee to stay, but they don’t need to be gone forever. She may offer to do contract work, or be used as a resource on future projects.

In order to create some continuity after the departure, ask if you can keep in touch. Even schedule some days to reconnect in the upcoming weeks or months.

Taking steps to recoup whatever you can helps everyone regain balance in the wake of a significant resignation.

Work Through the Aftermath

Work Through the Aftermath

After the initial shock of a surprise resignation, you may transition quickly into panic. Who’s going to pick up the slack? Will you have to come in early and work into the evenings to be sure everything gets done?

There’s a lot on your plate, that’s for sure. A steady approach ensures a smooth ride through this interim phase.

Discuss With the Team

Offboarding rituals reflect on the company’s culture and values as much as any other process in the workplace. Many team members may be devastated by the departure, and so make an effort to sit down with everyone to break the news face-to-face.

In addition to announcing the persons’ resignation, take the time to celebrate everything he contributed to the company. Recap his achievements, and wish him well in new endeavors.

Additionally, communicate a plan to the team for going forward. Explain how things will roll in the interim before a replacement is hired. This settles the team, and calms any jitters they may feel.

Break It to the Boss

We’ve been told that people don’t quit jobs, they quit bosses. It’s hard to not to see a resignation as a reflection on your performance as a manager. You may be worried that the departure will hurt you professionally.

In the interest of the company, it’s necessary to brush these concerns aside. You and your boss both know that resignations are a risk any organization assumes. Now is the time to behave professionally, and quickly implement a plan for going forward.

Divide the Work

It takes some finesse handling all the additional work following a resignation. Have open conversations with your boss and the team, letting them understand the pressure you’re under.

Sometimes it’s hard to hand things over, but no one should have to do the work of two. Carefully delegate work to others, and openly discuss competing priorities to receive advice on what to focus on now, and what to complete later.

When everyone shoulders some of the burden, it’s easier to make it through.

Hire a Replacement

You’re probably eager to find a replacement right way. Work closely with human resources to find a good fit, and put things in place when the new hire arrives. This way, she feels supported in the new role.

Offboard with Grace

Offboard with Grace

As mentioned, a resignation needn’t be a final farewell. A client chooses to discontinue services for a variety of reasons, and so it shouldn’t be seen as a personal affront. Rather, it’s a window of opportunity to build a bridge and maintain a professional connection.

An offboarding process that maintains strong ties and keeps the door open can lead to referrals and boomerang employees, among other great benefits.

Here are some guidelines for a smooth offboarding.

Use an Offboarding Checklist

Utilize a solid offboarding process that follows compliance laws and gathers technology. Additionally, whenever possible, ask the departing employee to transfer job responsibilities and wrap up current projects.

Keep the Door Open

Following a strong offboarding process allows an organization to amass a wealth of social capital over the years. Taking steps to keep in touch with employees can be a simple process that you repeat whenever someone leaves.

Sending out periodic emails or newsletters to former employees keeps them in the loop about everything going on in your company, and lets them know you want to retain the relationship. Should they ever decide to return, they’ll know that the door is still open. And if not, they’re far more likely to send a good reference your way.

Stem the Bleed

Stem the Bleed

A resignation, although stressful, is the reality of any organization. And with the growing gig economy, job tenures on average are becoming shorter and shorter.

Learning from a resignation allows you to take measures to diminish the fallout from future resignations.

Plan for It

If you anticipate that most employees will only stay with the organization for two years or more, it allows you to approach the position strategically.

Consolidate the onboarding process, to make sure the employees’ time is spent as efficiently as possible. Schedule several one-on-ones to quickly identify things they don’t understand.

These measures allow you to make the most of an employee while they’re with you, and have an efficient transition after they depart.

Streamline Processes and Cross-Train

Losing an employee can be like a house of cards falling down. If someone works independently from everyone else, it’s very difficult to pick up the ball after she leaves!

Documenting processes and roles eliminates this risk. It makes every task trainable and repeatable. Additionally, utilize opportunities to cross-train. This way, when one person leaves, someone else can take on the role for a time.

Learn From the Exit Interview

Be sure to ask many questions in the exit interview. What would he or she have changed about the position? Was there a specific incident that led to the departure? How might it have been prevented?

Next, take these lessons and apply them to the current team. Identify the steps you’re taking as an organization to train, develop and challenge employees.

When you have a great system in place, you can move on after a resignation without a hitch.

Conclusion

Losing a key employee can be a huge blow. But you needn’t lose your bearings.

Initially, take some time to talk to the employee face-to-face, to identify her reasons for quitting, and salvage any opportunities for maintaining contact. Taking steps to break the news to the team and carefully delegating work keeps everything in tact until a new person is hired.

Resignations are becoming the norm of workplaces, and having processes in place mitigates the impact and allows for smooth transitions.